January 2019: Jonas Dupuich’s Deadwood Presentation

This is the second of three Jonas Dupuich demo write-ups in this weekend’s triple play. – Ed. 5/18/19

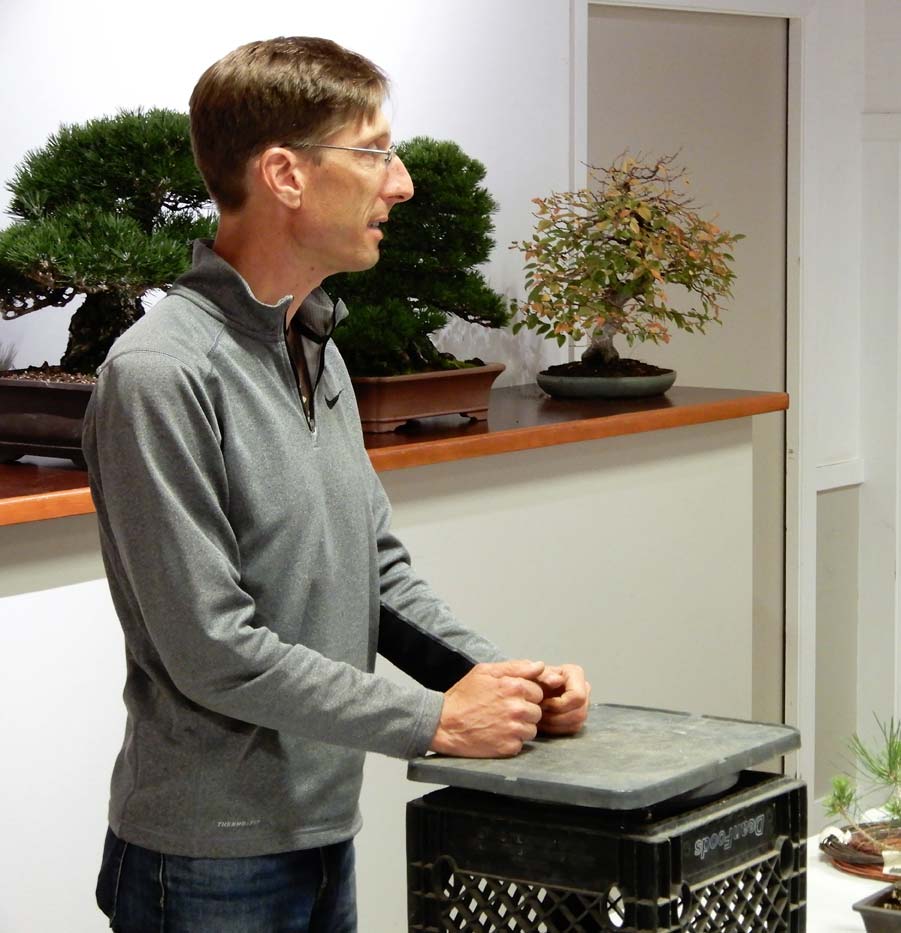
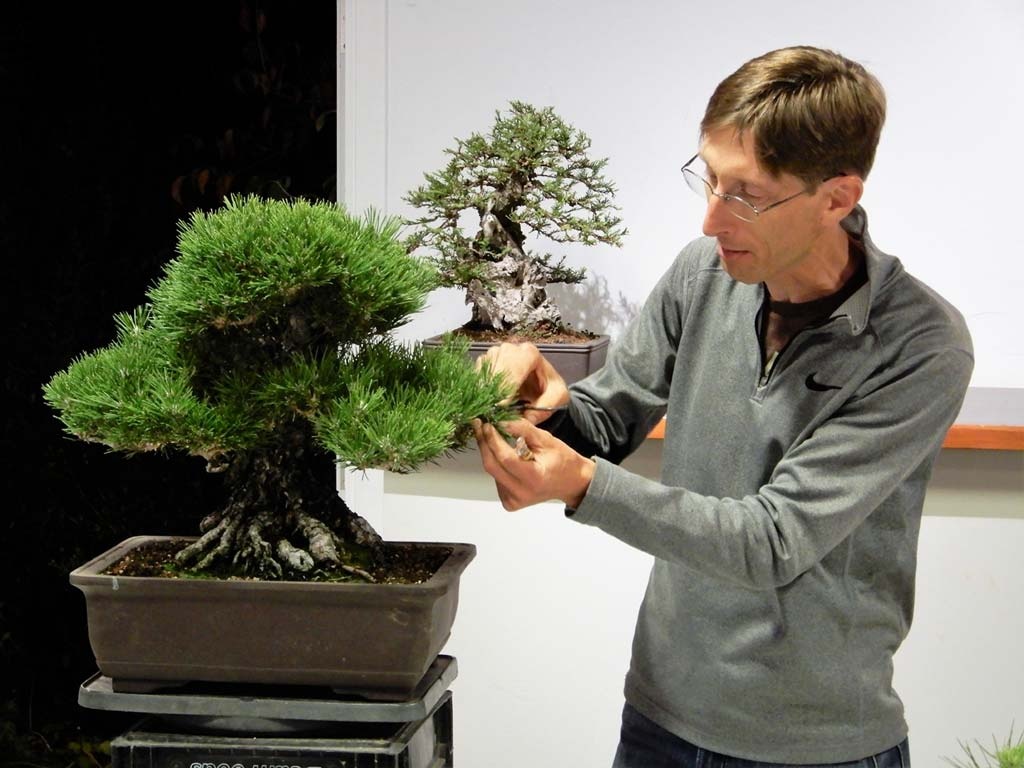
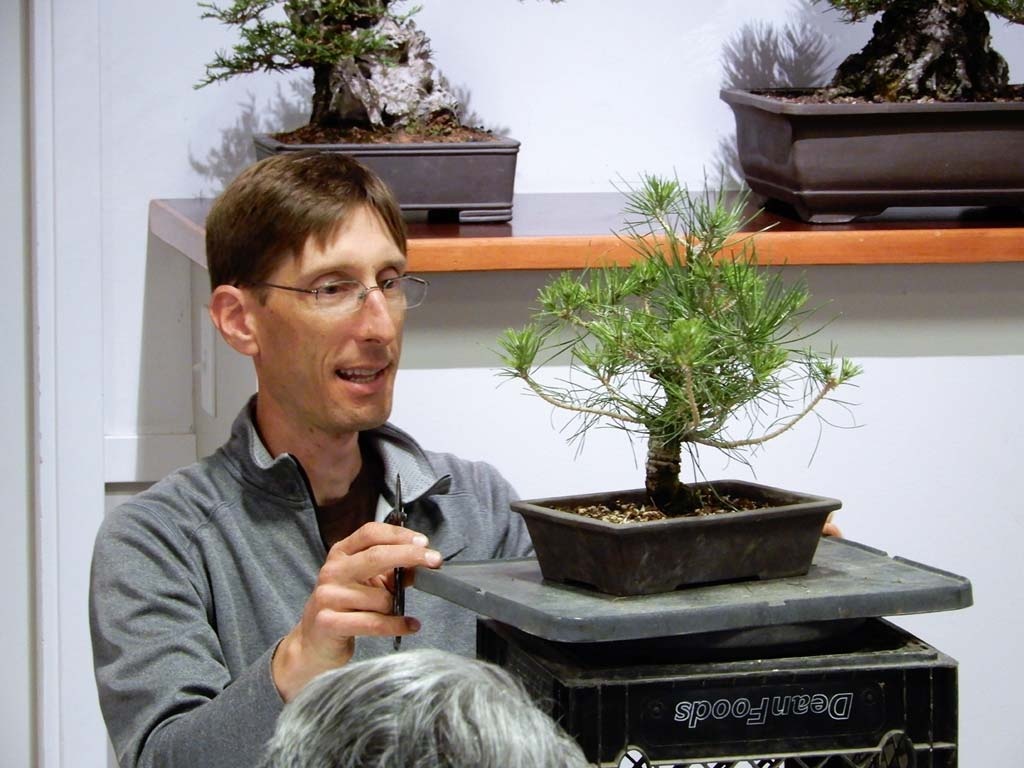
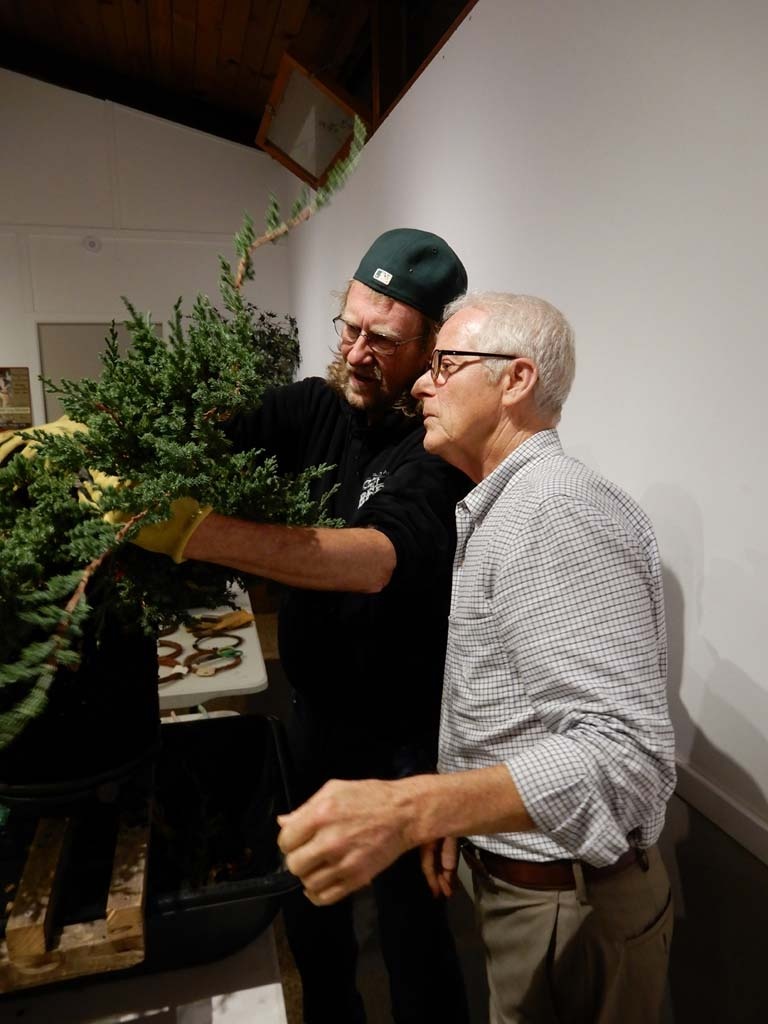
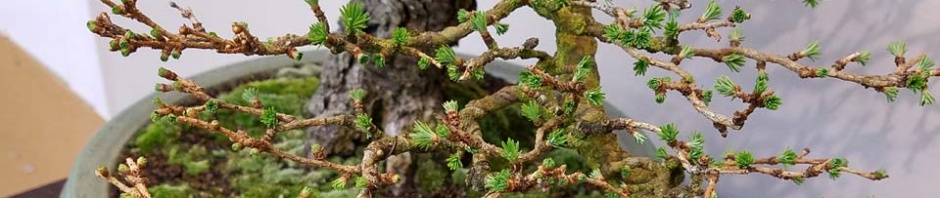
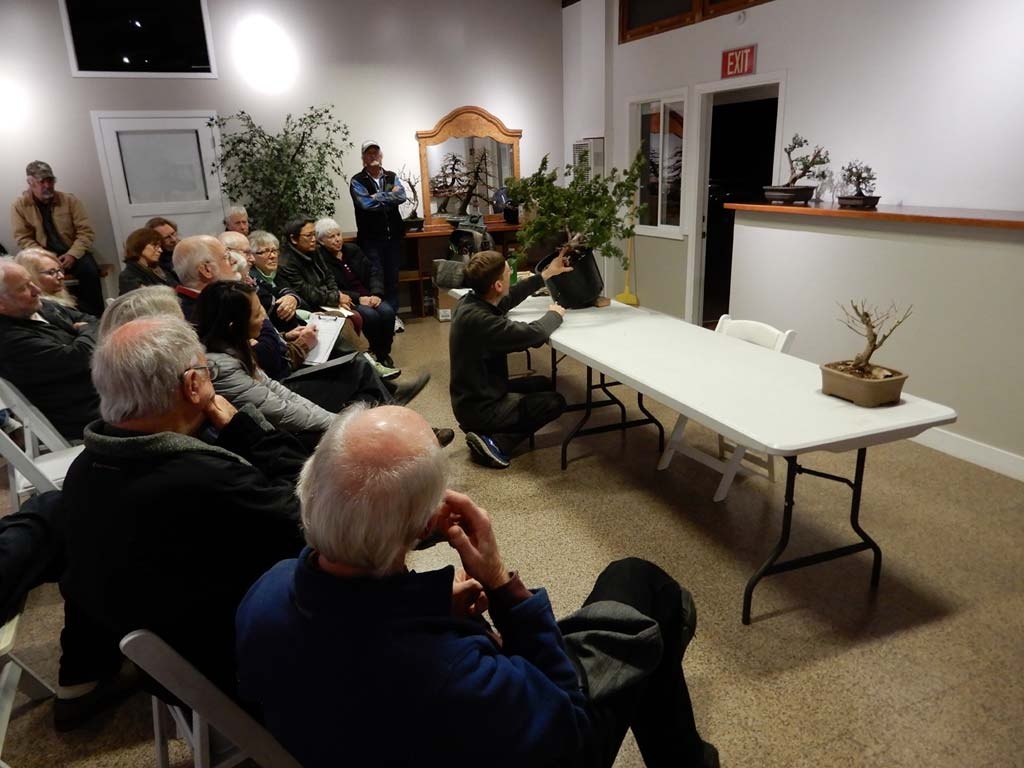
Jonas Dupuich, local bonsai professional and the curator of bonsaitonight.com, joined us again at the beginning of 2019 to talk about carving deadwood. He brought a Shimpaku juniper with him to carve for demonstration purposes and a crape myrtle to raffle at the end of the night.

Jonas started by talking about the best trees for deadwood and when to create deadwood on a tree for the first time. He brought the juniper for demonstration and talked mostly about junipers because they are the trees most enhanced by deadwood. Most other trees can have deadwood, but it’s difficult to maintain on deciduous trees, which are more likely to rot away rather than dry out, and some varieties, like pine, are valued so much for their bark that stripping it off would be a bit crazy.

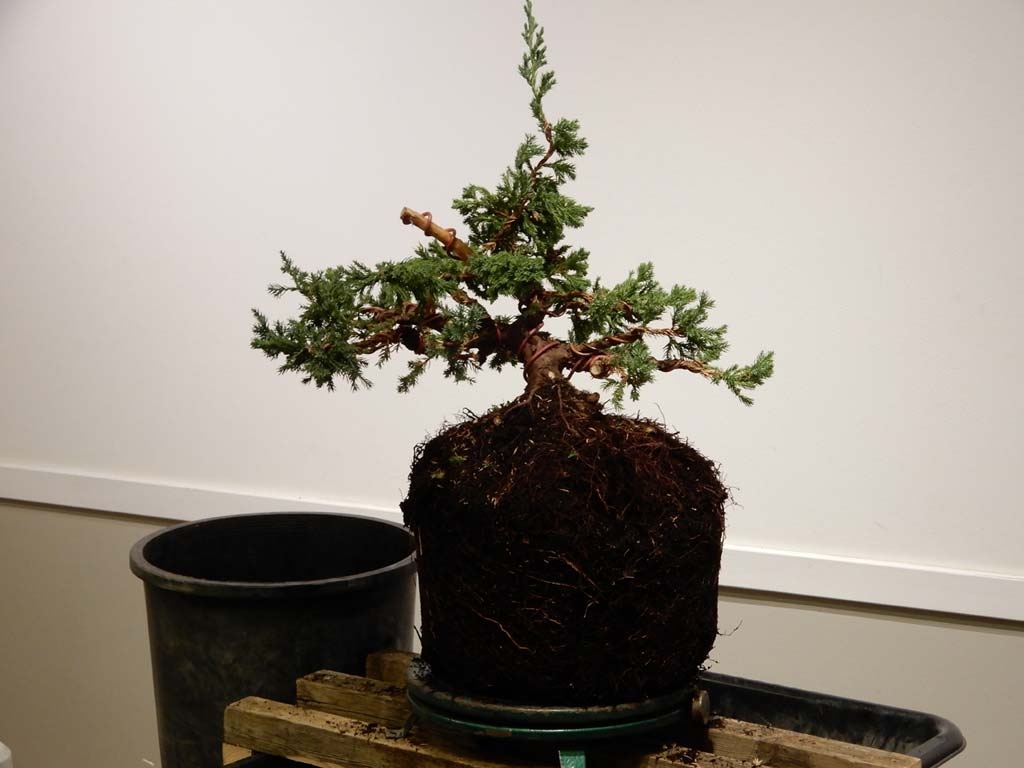
Junipers heal up so quickly, there’s no real point in carving a small one. It is common, however, to carve a collected or early-stage developing tree relatively early, because it’s easier to get to everything without fully developed branches getting in the way.

To round out his introduction, Jonas explained lifelines and the importance of not destroying too much of them. As has been seen on many a dramatic bonsai, a very high percentage of a juniper’s trunk can be dead, so long as there is a healthy lifeline running all the way from the roots to the foliage. Carefully tracing a lifeline, which can often perform many twists and turns, is challenging, but you also have to remember that it works both ways. It’s fairly intuitive that destroying a lifeline will kill the foliage above it, but you also have to remember that if you destroy too much of the apical foliage being fed by a lifeline, the tree may give up on that entire lifeline, killing not just the apex, but lesser branches along the way as well.

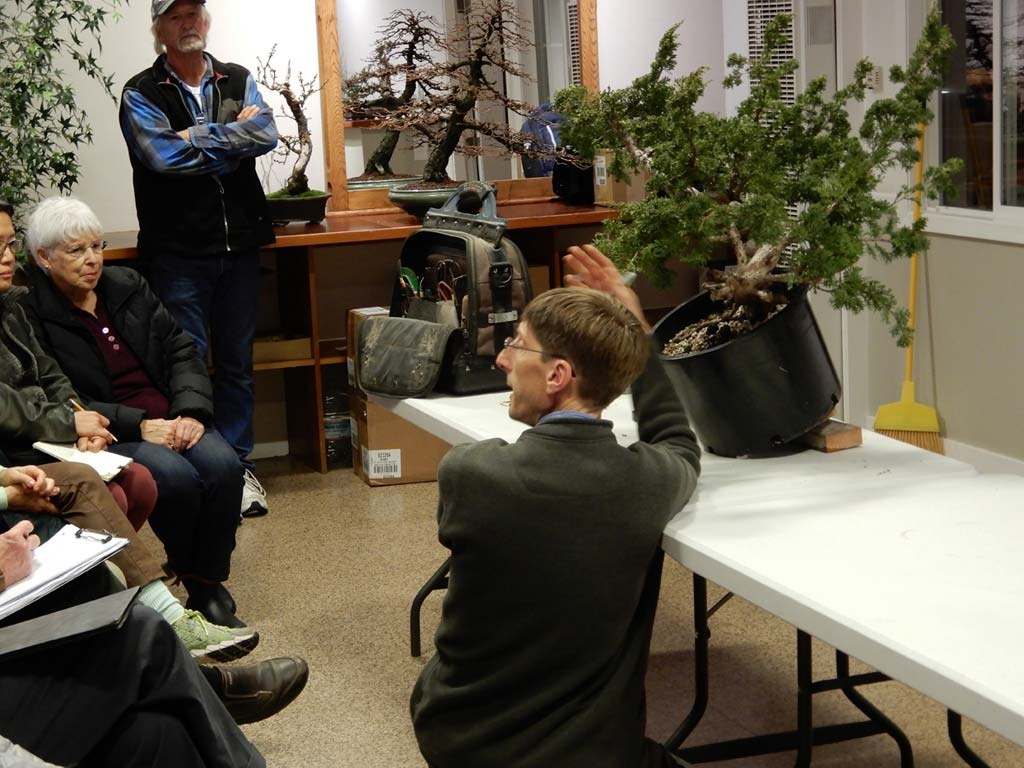
While on the topic of lifelines, Jonas added a side note, highly recommending twisting all branches when you wire them throughout the development of any bonsai. Twisting the branches not only adds more character, but it also adds more opportunities for intricate and fascinating deadwood should the desire to create some arise later on.

To segue into working on the Shimpaku juniper he brought with him, Jonas fielded suggestions as to where to start stripping bark to create a shari–an area of bark stripped along the trunk or a major branch. He talked a bit about where deadwood makes the most sense. For example, deadwood often occurs in association with dead branches, but it can also develop under live branches when some damage doesn’t heal properly because of the shade. Randomly placing deadwood where it doesn’t make sense will cause it to overpower the overall look, instead of blending in naturally and completing the tree’s overall “story.”

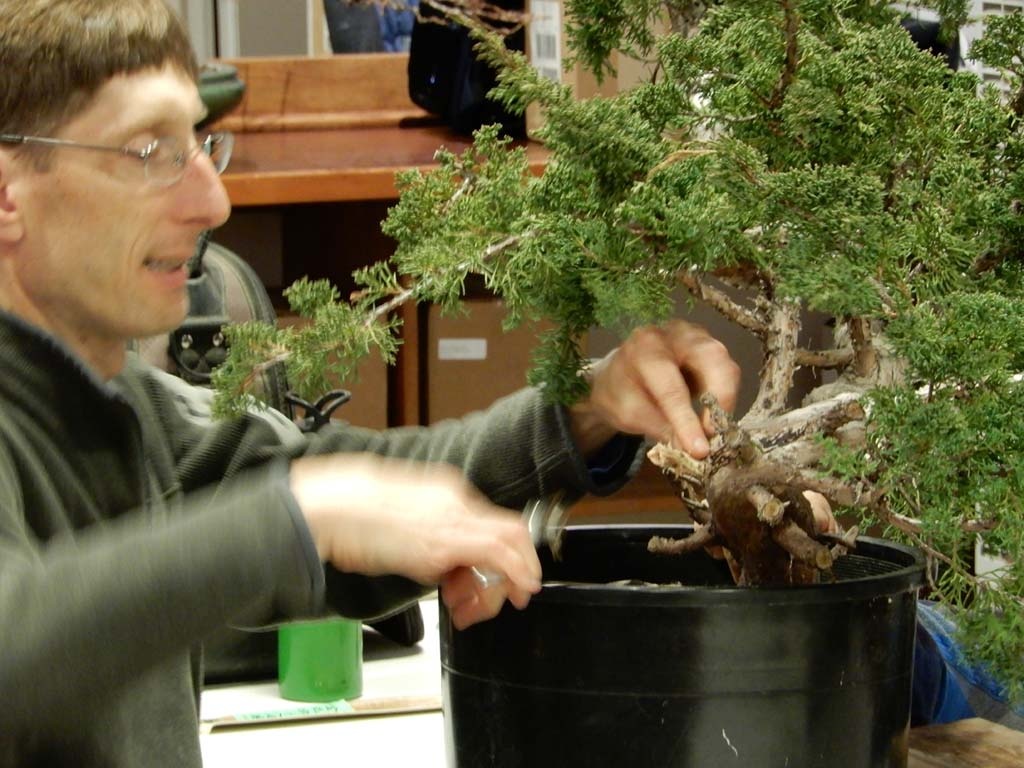
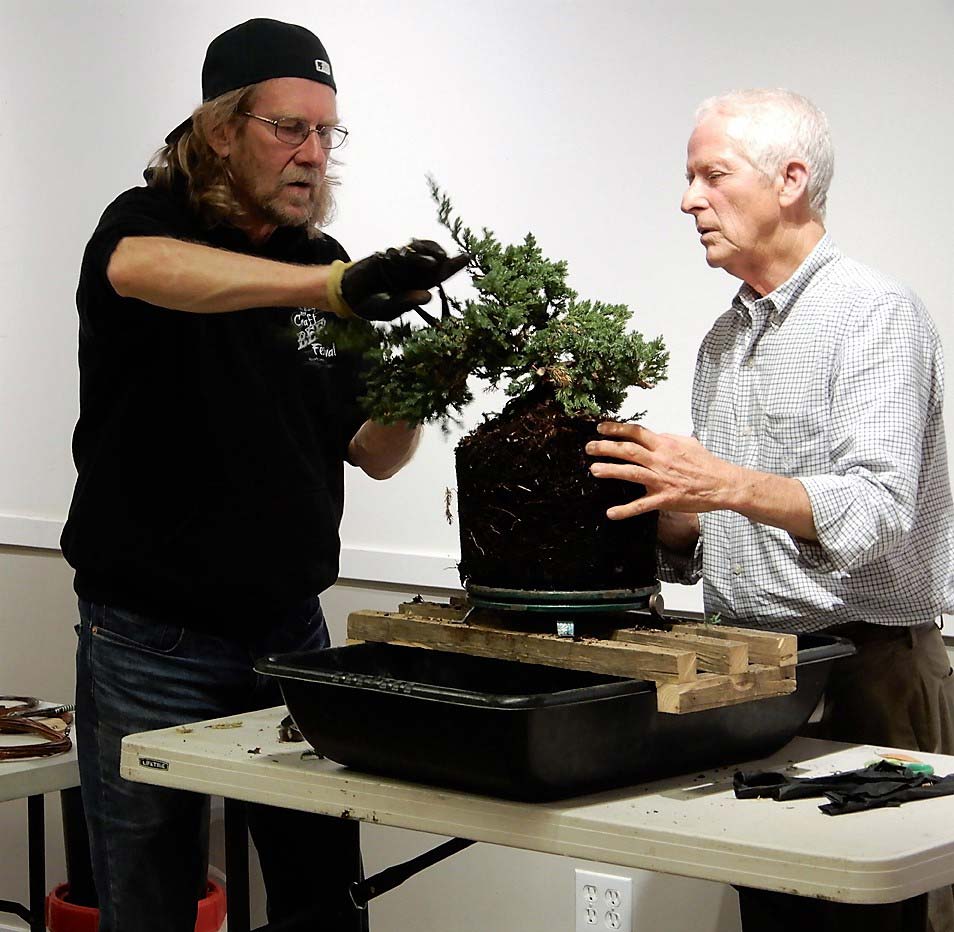
Once we had all agreed where it made the most sense to place a shari on the current tree, Jonas outlined the area with a black permanent ink pen. He highly recommends doing that so you don’t lose track of where you intended to cut, something that can easily happen once you get in close to make the cuts. To begin the cutting, Jonas likes to start with a very sharp (e.g., grafting) knife, cutting the lines he just drew to isolate the area of bark he will be stripping. That way he’s sure to avoid over-stripping into areas meant to be left alone, which can easily happen once the bark peeling begins, because it will often come right off in long . . . well, strips. Note that old, dead bark is considerably harder to strip than live bark. It’s often more of a chipping or chiseling activity than a stripping one, so if you know you’re going to strip a newly dead area eventually, it’s best to not let it sit for too long.

Because the selected area on Jonas’ tree contained a dead branch, he started with that first. There are advantages to starting with any dead branch stubs present in your intended deadwood area because, with the techniques Jonas was about to show us, you can greatly enhance the surrounding area by starting Continue reading

Posted in Meeting Recap | Leave a comment

November 2018: Jonas Dupuich’s Pine Presentation

Here’s the first in a triple play of Jonas Dupuich’s demo articles recently submitted by our eloquent columnist David Eichhorn. – Ed. 5/18/19

Jonas Dupuich, highly accomplished and partly Japanese-trained bonsai expert and the creator and curator of bonsaitonight.com, joined us this mild November night to talk about pine tree bonsai and the Fall work that we can do with them. He brought a couple trees with him for demonstration purposes, plus a younger tree that we raffled at the end of the night. His talk was tailored to the black and red pine varieties. Perhaps a little of what he discussed can be applied to white and other pines, but do so with caution and consultation. For instance, references to decandling exclude white pines because they don’t get decandled.

From his extensive experience and experimentation with pines, Jonas has learned that there are two principle activities we can do with pines in the Fall: (1) Thinning and Balancing branches and (2) Needle Plucking. There are several benefits to each of these procedures, most of which involve the energy distribution throughout the tree. For instance, you might thin the branches in a particular area of the tree to reduce the vigor of that area (e.g., to avoid swelling), or you might pluck needles to stimulate bud production. Plucking needles is also used to reduce vigor, but it ultimately pushes the tree, through hormonal activity, to produce more buds in its attempt to restore food production in the plucked area. Jonas described the three types of buds on pines: apical growth tips, needle buds, and adventitious buds–which are the ones that show up when you pluck needles in an area. Adventitious buds are also the ones that show up randomly if a branch is getting sufficient sunlight or other stimulation.

An important note: all the Fall work Jonas recommends assumes the appropriate Spring work has been done. More of the specific benefits of needle plucking and branch thinning, including particulars about timing and techniques, in fact much of Jonas’ talk, are discussed in the note sheets he distributed before the talk. If you would like a copy of those handouts, contact the author of this article, David Eichhorn, or email info@marinbonsai.org.

One thing Jonas discussed at some length that you won’t find in the handouts: the specific types of pests that can be largely prevented by keeping up on your needle plucking and branch thinning. The typical pests you might find on pine bonsai include scale, aphids, root aphids (difficult to diagnose), spider mites, and adelgids–a parasite that forms at the base of pine candles. There are various cures for each of these, but the best preventative is thinning, to allow more airflow throughout the tree.

A particularly valuable note from the handout that Jonas emphasized during his talk is that the more branches you have on a developing tree, the shorter your internodes will be. So you may want to hold off on branch thinning for younger pines. Similarly, don’t pluck needles if you’re still trying to fatten up your trunk, because doing so will reduce overall vigor and vigorous growth is key to trunk development.

In his talk and on the handout, Jonas also made sure we understand the difference between plucking old needles, which practically fall right off, and plucking new needles, which require more caution, since they have a tendency to cling to and tear the bark around them. Be careful! Always pull in the direction the needle is growing, NOT down the trunk or branch. Bark tearing can cause unsightly and slow-healing damage on most trees, but pine bark is particularly precious.

When it comes to where on the overall tree we should pluck the most needles for optimum energy distribution, Jonas has his own viewpoint on the strategy to use. He calls his view “unifying” because one popular strategy is to pluck more needles from the strong areas to weaken them and balance the tree, whereas others say to take the same number of needles from all over. Jonas pointed out that the lower, weak areas aren’t likely to have as many needles as the top, strong areas to begin with, so if you take the same proportion of needles from every area, with none being taken from the weakest areas, then you will probably strike the right balance. Jonas’ second handout had a nice illustration of this concept, including a comparison between doing this to a decandled tree versus one that hasn’t been decandled.

Jonas also let us in on a big trick to help shorten long internodes: at decandling time, you aren’t limited to trimming the actual candles, you can trim back to any point on the branch that has needles and the tree will treat that as the new apex and sprout one or more new buds on the spot. Much like an elm would do, apparently. But again, make sure there are needles where you cut.

Jonas wrapped up by giving some specific coaching for the raffle tree, which was won by Michaele Jaffe. Congratulations, Michaele!

– David Eichhorn

Photos by George Haas and Sharon Bone

Posted in Meeting Recap | Leave a comment

October 2018: Chris Ross & John Doig

Here’s another inspiring article that was turned in recently by our esteemed copywriter, David Eichhorn. We’re catching up! – Ed. 5/13/19

In October of 2018, the collected club enjoyed one of its favorite regular demonstrations: the Chris Ross and John Doig show. That is to say, Chris and John brought a pre-bonsai with them and, in the gentlest manner possible, showed us how to turn a common nursery shrub into the beginnings of a bonsai tree.

Chris opened the demonstration with a quick expression of his feeling, shared by many other members of the bonsai community these days, that demonstration bonsai can sometimes receive a little too much abuse. Except in the case of higher-level demonstrations involving expensive trees, most bonsai demos that we see take relatively cheap pre-bonsai stock, like a landscape shrub, and stress the heck out of it making it look as much like a bonsai as possible in two to three hours. Chris said that he and John would not be doing that with this tree, a nicely complex procumbens nana juniper that did indeed come from a landscaping nursery.

John, clearly the more aggressive tree-whacker of the two, was showing obvious signs of trying to contain his disappointment while fingering a sharp pair of pruning shears. Kidding aside, though John may be a slightly more aggressive tree artist than the more contemplative Chris, they both agreed upon, and demonstrated throughout the night, Chris’ ultimate point: don’t over-stress your new pre-bonsai by changing too much at once.

So with the goal in mind of turning this once-future-shrubbery into something closer to but not quite a bonsai, Chris started asking the audience for input regarding what to look for in the material that might be saved or removed to give more of a bonsai feel to the overall plant. He reminded us that a good place to start is the trunk line, which must be examined carefully even before you purchase such a plant, to make sure it will lend itself to a bonsai look. At this early stage of doing the very first bonsai-related cutting and wiring on a tree, the trunk will give clues as to what type of structure you can achieve with the tree in the future.

Considering this particular tree, Chris pointed out that the branches had previously all been bowed over when it was being groomed as a landscape plant. The temptation would be to create a cascade or semi-cascade look, but the base of the trunk and other factors made it a poor candidate for a cascade treatment, so Chris said that a bowing branch needed to be chosen to bend up and treat as a new apex for the trunk.

About this time, a member of the audience asked about choosing the front for the tree, given its importance for decision-making in the early development of any bonsai. For the time being, however, Chris said that choosing a front is a bit irrelevant, because there’s so much growth to deal with. Most of what happens with a pre-bonsai like this is cutting away the existing branches in favor of back buds and other new growth that is more pliable and, preferably, more densely foliated close to the trunk–or at least capable of becoming so. Once one is finished with that process, there typically won’t be anything left that is developed enough to dictate where the front should be. You might have some idea, but little to no certainty.

After finally setting John loose on cutting back the tree, Chris went on to explain that branches that are too long for where they are on the tree should be lopped off, or greatly reduced in favor of back growth if they’re not unreasonably thick. He said this as John selected a significant, but particularly disproportionate, branch of the juniper and completely removed it from the trunk. Remember that to give it a natural look, a bonsai’s branches should generally get shorter and definitely thinner as you go up the tree. Furthermore, Chris said, absolutely no branch on a bonsai should be longer than one-half the height of the tree. The obvious exception to that would be if that branch is being allowed to run for a season or two in order to thicken it up.

Some additional points that Chris made while John was removing unsightly branches: Being able to see through your bonsai is an important quality. It gives a sense of depth and structure to the tree. Therefore, plan for space between your eventual foliage pads, even if it’s not possible to create it right away. Also, the newly chosen apex should be left alone now and for the near future, so that it will develop thickness and become a more convincing continuation of the trunk.

With about half the foliage gone, the tree was ready for some wire. Chris and John only wanted to wire a few branches, leaving the rest of the wiring, and the stylistic decisions it might require, to the winner of the tree. Chris said that at this stage, wiring is critically important so that the branches can be spread apart, allowing all of the internal, developing growth tips to get the maximum amount of sun. Chris actually won the raffle for the tree, but gave the tree to Lake Hanyu, who was very thrilled to receive it.

– David Eichhorn

Photos by George Haas

Posted in Meeting Recap | Leave a comment

May 2018: Peter Tea – Deciduous Trees & Thread Grafting

2018? – Yes, that is the correct year. Our talented wordsmith David Eichhorn made us wait a bit for this one but we think it’s worth it. – Ed.

This article is crazy long, partly because of the popularity and intricacy of the topic, but also because Peter talked a lot more than intended about deciduous trees. That was because we had a lot of new members at the time and he wanted to be sure that they were getting a leg-up on some of the basic material we have covered in the past. Therefore, I am suggesting that the newer, less knowledgeable readers read this entire write-up, while those who are familiar with many of Peter’s former talks may want to skip ahead to the section on thread grafting.

Professor Tea

For both parts of his talk, Peter Tea showed up with four trees. He brought three of the trees to talk more about deciduous tree development–two of which we have seen him work on before–and he brought the third as an example tree to introduce us to the topic of thread grafting.

Deciduous Trees

On the whiteboard behind him, Peter had written the common horticultural manipulations for bonsai we have discussed every time before, because they represent the cornerstone knowledge he developed with us in his first few talks in this ongoing series. For review, they are: Sun, Water, Soil (and the Pot), Repot Interval, Fertilizer, and Cutting. He turned to this list at the outset of his talk to point out the ones that are most appropriate to consider when deciding how to encourage or discourage growth in our trees in May. Note that all but Cutting affect the tree overall.

According to Peter, cutting (including pinching) is just one of four important things to consider doing in early May. Fertilization, wiring, and defoliation are the others. To illustrate the importance of starting to fertilize by early May, Peter drew a horizontal curve Continue reading

Posted in Meeting Recap | Leave a comment

Markus Makes Big Hit with ‘Learning the Art of Bonsai’

It took place on Thursday evening, April 18, 2019, at the Novato Charter School’s Project Night 2019, where Markus Mieritz gave his 8th grade project ‘Learning the Art of Bonsai’. The audience of classmates, family and friends, including the 7th grade students, was full to capacity with standing room only. There were 26 8th grade students in total, presenting their individual projects, ranging from Italian Cuisine to Short Film Production.

Markus’ presentation was all about bonsai and his year long endeavor to become a bonsai hobbyist. He said the project led him to find “the best bonsai club in California right here in Marin County.” Markus showed slides of his collection of bonsai. He thanked his mother for her support. He also thanked Marin Bonsai Club senior member, instructor and mentor Chris Ross for his coaching and patience. Markus received a huge applause from the audience and his classmates.

– George Haas

Posted in Event Recap | Leave a comment